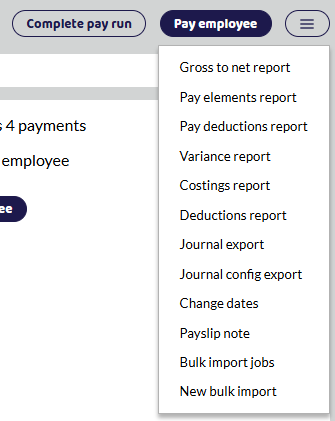
To import payments go to the current open pay run. Click the button in top right corner and select New bulk import.

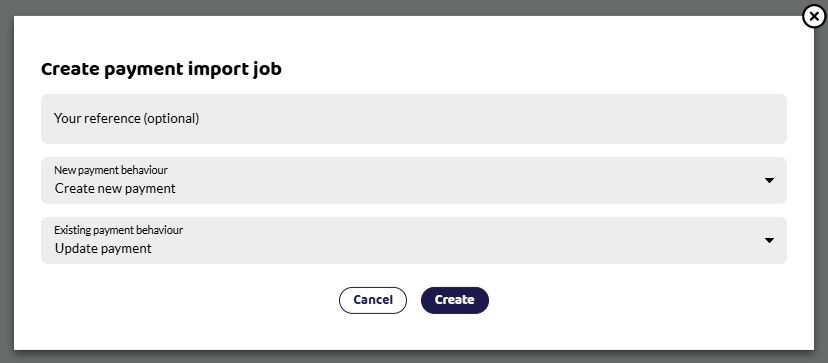
When importing payment file you can choose from the below behaviours.
New payment behaviour:
Create New payment - (default) if there is no payment, the import will create one Ignore these records - if there is no payment, the import will not create one
Existing payment behaviour:
Update payment - (default) if there is an existing payment, the import will update it Ignore these records - if there is an existing payment, the import will not update it.

To import data into a pay run in Shape Payroll, create a CSV file with column headings that match those below.
Include a row for each payment you want to make to each employee. For example, to pay an employee some hours, and expenses, include 2 lines in your file with the same ID, one of Type 'hours' and one of type 'expense'.
If you plan to upload multiple files or need to make corrections by uploading a file again, make use of the Reference column.
Column Definitions
Field | Notes |
|---|---|
"Pay ID" or "Employee Code" | The ID for the employee being paid. If the column header is 'Pay ID' the employee will be looked up by RTI Payroll ID, if Employee Code is used the employee will be looked up by Employee Code. |
Cost Code | Optional cost code to use in reports |
Type | "salary", "hours", "days", "shifts", "expense", "holiday", "ssp", "smp", "spp", "shpp", "sap", "spbp" |
Description | Optional text to display to the employee to describe the salary. If empty, a sensible default will be used. |
Quantity | E.g. 5 for five hours |
Amount | Payment rate, e.g. 10.20. The total amount paid will be quantity x amount. |
Reference | Optional unique reference for this import. |
Further Notes
ID
Either the RTI Payroll ID (Pay ID) or the Employee Code can be used to find which employee to pay.
Rows are grouped by the ID and if an employee is found a payment is added to the pay run with a line for each matched row in the import file.
Reference
The reference column can be used to overwrite previous uploads. For example, if you are managing salaries in Shape, but importing overtime hours from an external system you could add that system's name to the reference column. If you discover a mistake has been made after importing the file, importing another file with the same reference will overwrite the data from the original file.
Cost Code
The cost code can be used to group payments in the costings report, as well as to create rules in the Journal export.
Adding Custom Fields
Analysis fields are user defined fields you can set up to hold any information you would like them to. These can be entered under custom fields and included in the payment file.
To import custom fields, include additional columns at the end of the import with "AN_Custom Field Name" as the heading. You will then be able to import any number of custom fields alongside the hours or pay you're importing. For further guidance on creating these please see our help section Custom Fields.
Examples
To get started quickly, use one of these example templates: